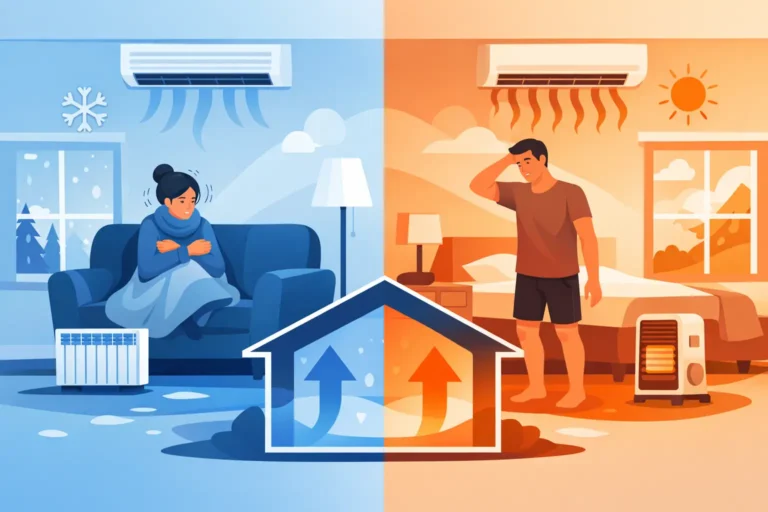
How to Fix Uneven Room Temperatures
One bedroom stays chilly, the back of the house feels stuffy, and the living room never seems to match the thermostat. If you are trying to fix uneven room temperatures, you are not dealing with a small annoyance. You are dealing with a comfort problem that usually points to airflow, insulation, duct, or equipment issues that need real attention.
In Central California, this tends to show up fast. Our summers put cooling systems to work for long stretches, and even a small problem can turn into hot spots, cold spots, higher utility bills, and a system that runs harder than it should. The good news is that uneven temperatures are often fixable. The key is figuring out why they are happening in your specific home or building.
Why uneven room temperatures happen
Most people assume the problem is the thermostat, but that is only one possibility. A house can have temperature differences from room to room for several reasons, and sometimes more than one issue is happening at the same time.
Airflow is one of the biggest factors. If one room is getting strong airflow and another is barely getting any, they are not going to cool or heat evenly. That can come from dirty filters, blocked vents, poorly designed duct runs, leaking ducts, or dampers that are out of adjustment.
Insulation also matters more than many homeowners realize. A room above the garage, a west-facing bedroom, or an addition built at a different time than the rest of the house often gains or loses heat faster. In those cases, the HVAC system may be working properly, but the room itself is harder to keep comfortable.
Then there is equipment sizing and age. An oversized system may cool too quickly without running long enough to balance temperatures throughout the house. An older system may struggle to deliver consistent performance to every area. Even a well-built home can end up with uneven comfort if the system is no longer matched to the layout or the home has changed over time.
How to fix uneven room temperatures at home
The right fix depends on the cause, so it helps to start with the simple checks before assuming you need major work.
Start with the air filter and vents
A clogged air filter can reduce airflow across the whole system. That often shows up first in rooms that are already harder to condition, like far bedrooms or upstairs areas. If the filter is dirty, replacing it may improve comfort faster than expected.
Next, check supply and return vents. Furniture, rugs, curtains, and closed doors can all interfere with airflow. A room with a supply vent but poor return airflow can end up feeling stale, stuffy, or warmer than the rest of the house. Open vents fully unless a technician has specifically advised otherwise. Closing vents in unused rooms sounds efficient, but it often creates pressure problems and can make uneven temperatures worse.
Look at the thermostat location
If the thermostat is in a hallway, near a sunny window, or close to a kitchen, it may not reflect conditions in the rooms you actually use most. The system shuts off when that spot reaches the target temperature, even if the back bedrooms are still too warm.
This does not always mean the thermostat is bad. It may just be in a poor location for the way the house behaves. In some homes, upgrading to a smart thermostat with remote sensors can help the system respond to the rooms that matter most instead of a single wall location.
Check for duct problems
Ductwork issues are a very common reason homeowners cannot fix uneven room temperatures on their own. If ducts are leaking, disconnected, crushed, or poorly sealed, conditioned air may never reach the room that needs it. In attic spaces, that loss can be significant.
Signs of duct problems include weak airflow from certain vents, dust buildup, rooms that are always uncomfortable no matter the season, and energy bills that keep creeping up. A proper duct inspection can reveal whether the problem is leakage, sizing, routing, or balancing. This is one of those areas where guessing usually costs more than diagnosing it correctly.
Insulation and sun exposure make a big difference
Sometimes the HVAC system is not the main problem. The room itself may be fighting against the system all day long.
Rooms with a lot of afternoon sun often run warmer, especially in our area where summer heat is no joke. Older windows, thin attic insulation, and poorly sealed wall penetrations can all let heat pour in. In winter, those same weak spots let warmth escape.
If one room is always off by several degrees, think about what is around it. Is it over the garage? Under the attic? On the west side of the home? Does it have large windows or older insulation? In those cases, improving attic insulation, sealing air leaks, or upgrading windows may do more for comfort than changing the thermostat setting over and over.
That is also why there is not one universal fix. Some homes need duct repair. Some need better insulation. Some need both. Honest troubleshooting matters because replacing equipment will not solve a building-envelope problem.
When the system itself is the issue
If you have checked the basics and the temperature differences keep coming back, the equipment may be part of the problem.
Your system may be the wrong size
Bigger is not always better in HVAC. A system that is too large can short cycle, turning on and off before air has time to circulate evenly through the home. That can leave some rooms comfortable and others behind. A system that is too small may run constantly and still struggle to keep up in rooms with higher heat gain.
Proper sizing depends on square footage, insulation, windows, duct design, ceiling height, and more. It should not be based on rough guesswork or the size of the old unit alone.
Aging components can reduce performance
Blower issues, low refrigerant, dirty coils, failing motors, and other wear-related problems can affect how evenly your system moves air and maintains temperature. Sometimes the system still runs, but not well enough to keep all rooms comfortable.
That is where a professional evaluation helps. A thorough service call should look beyond whether the unit turns on. It should look at airflow, temperature split, duct delivery, and whether the system is operating the way it was designed to.
Fixes that work for stubborn hot and cold spots
When uneven temperatures are persistent, a targeted solution usually works better than a temporary workaround.
Air balancing can help if some rooms are getting too much airflow while others are getting too little. This involves adjusting dampers and evaluating system delivery so the air is distributed more evenly. It is more precise than closing random vents and hoping for the best.
Duct repair or replacement may be the answer if the duct system is leaking or poorly configured. In many homes, especially older ones, the ductwork has never been optimized for comfort.
A ductless system can also make sense in certain situations, such as additions, converted garages, upstairs rooms, or areas that are consistently uncomfortable because they are hard to serve with existing ductwork. It is not the right fix for every home, but in the right application it can solve a long-standing problem without reworking the entire house.
Zoning is another option for larger homes or homes with clear differences between areas. With zoning, separate parts of the home can be controlled independently. That can be especially useful when upstairs and downstairs comfort needs are very different.
Don’t ignore the energy bill side of the problem
Uneven temperatures are not just about comfort. They often go hand in hand with wasted energy. When one room feels wrong, people tend to adjust the thermostat to satisfy that room, which can overcool or overheat the rest of the house. The system runs longer, wear and tear goes up, and utility costs follow.
Fixing the underlying issue usually improves more than comfort. It can reduce strain on the equipment and help the system last longer. That matters if you want to avoid replacing a unit before you really need to.
A company like Mel's Heat & Air Inc. sees this often - what starts as a hot bedroom complaint turns out to be a duct leak, insulation gap, or airflow issue that has been wasting money for years.
When to call a professional
If you have changed the filter, checked the vents, and made sure nothing is blocking airflow, but certain rooms are still off by several degrees, it is time to have the system looked at. The same goes for rooms with very weak airflow, comfort problems that change by season, or temperature issues that have gotten worse over time.
A good HVAC technician should not rush straight to the biggest, most expensive recommendation. The right approach is to inspect the system as a whole - equipment, airflow, ductwork, thermostat setup, and insulation-related clues. That is how you get a fix that actually lasts.
Comfort should not be a guessing game from one room to the next. If your house has hot spots, cold spots, or rooms that never seem right, the problem is usually telling you something useful. Getting to the root of it can make your home feel better every day, not just on the mild-weather days when the system barely has to work.
If your hot water runs out halfway through a shower, or your utility bills keep creeping up, the question usually comes fast: should you replace your system with a standard water heater or tankless unit? For homeowners in Central California, that choice is less about trends and more about how your household actually uses hot water every day.
A lot of people hear that tankless is "better" and stop there. Sometimes it is. Sometimes it is not. The right answer depends on your home, your plumbing setup, your budget, and whether you want the lowest upfront cost or better long-term efficiency.
Water heater or tankless: the real difference
A traditional storage tank water heater keeps a set amount of water hot and ready, usually 40 to 75 gallons. When you turn on the tap, that hot water is already sitting in the tank waiting to be used. Once the tank is depleted, you wait for it to recover.
A tankless system works differently. It heats water on demand as it flows through the unit. There is no storage tank holding hot water all day. That usually means lower standby energy loss and, in many cases, a longer equipment lifespan.
That sounds simple enough, but the trade-offs matter. A tank water heater is generally less expensive to install and easier to replace when your existing setup already uses a tank. A tankless system can be more efficient, but installation may require gas line upgrades, venting changes, electrical work, or plumbing modifications.
When a standard water heater makes more sense
For many homes, a standard tank water heater is still the practical choice. If your current system worked well for years and your family size has not changed much, replacing it with a similar model is often the most straightforward path.
Tank systems usually cost less upfront. Installation is often faster and less complicated, especially if your utility connections are already in place. That matters when your old unit fails and you need hot water back quickly.
They also work well for households with predictable hot water habits. If your family showers at different times, runs the dishwasher once a day, and does laundry in normal cycles, a properly sized tank can handle that load without much trouble.
There is also a repair and replacement angle to consider. Parts, labor, and replacement options for tank systems are familiar territory in most homes. If budget is tight and you need a dependable solution without extra upgrades, a traditional water heater is often the better fit.
When tankless is worth a closer look
Tankless systems tend to appeal to homeowners who want better efficiency and more continuous hot water. If your household regularly drains a tank with back-to-back showers, a tankless unit can solve a real frustration.
That is especially true in larger families or homes where hot water use stacks up in the morning and evening. A tankless system can keep producing hot water as long as it is sized correctly for the demand. That "sized correctly" part is important. If the unit is too small for the number of fixtures running at once, people still end up disappointed.
Tankless may also be a smart option if you plan to stay in your home for many years. While upfront costs are usually higher, the efficiency gains and longer service life can make the investment pay off over time. Many homeowners also like the space savings. Without a large storage tank, the unit takes up far less room.
Cost is not just the price of the equipment
This is where a lot of comparisons go sideways. People look at the equipment cost alone and assume they have the full picture. They usually do not.
A standard tank water heater often wins on purchase price and installation simplicity. In many cases, that makes it the best value for households that want reliable hot water without stretching the budget.
A tankless system can cost more at the start, and not just because of the unit itself. The total job may include venting changes, gas capacity upgrades, drain work, or electrical improvements. In some homes, that extra work is minor. In others, it changes the economics completely.
Operating costs matter too. Tankless systems are generally more efficient because they are not constantly reheating stored water. But savings vary by household. If your hot water use is modest, the monthly difference may not feel dramatic. If your home uses a lot of hot water every day, the efficiency benefit can be more noticeable.
Water heater or tankless for busy families
If you have a full house, the decision usually comes down to demand patterns. A tank system can serve a busy family well if it is sized properly, but there is still a limit to how much hot water is stored and ready. Once that reserve is gone, recovery time becomes the issue.
A tankless system avoids that stored-water limit, but it does not create endless capacity for every fixture all at once. It produces hot water based on flow rate. If two showers, a washing machine, and a dishwasher all run together, the unit has to be sized to keep up.
That is why honest sizing matters more than sales talk. Bigger is not always necessary, and smaller is not always cheaper if it leaves you frustrated every morning. A good recommendation should be based on how many bathrooms you have, how many people live in the home, what fuel source is available, and how often multiple fixtures run at the same time.
Efficiency, maintenance, and lifespan
Tankless systems often have the edge in energy performance, but they are not maintenance-free. Mineral buildup can be a real issue, especially depending on local water quality. Regular flushing and maintenance help protect performance and lifespan.
Tank water heaters need maintenance too. Sediment can build up in the tank, reducing efficiency and putting extra strain on the system. Routine service helps either type of equipment last longer.
As for lifespan, tankless units often last longer than standard tanks when they are properly installed and maintained. Traditional tank water heaters generally have a shorter life expectancy, but they remain popular because replacement cost is lower and the equipment is familiar, proven, and dependable.
What works best in older homes
Older homes in the Turlock area can make this decision a little more complicated. Plumbing layouts, gas line size, venting, and available space all matter. A tankless upgrade may be possible, but it may also involve more modifications than a homeowner expects.
That does not mean it is a bad choice. It just means the best answer should come after looking at the actual house, not after reading a generic recommendation online. In some older homes, staying with a tank system is simply the more practical and cost-effective move. In others, a tankless install makes sense and performs well for years.
The best choice is the one that fits how you live
There is no one-size-fits-all answer to water heater or tankless. If you want the lower upfront cost, simpler replacement, and dependable performance of a familiar system, a standard water heater is still a solid option. If you want better efficiency, longer potential lifespan, and more consistent hot water for a busy household, tankless may be worth the investment.
The key is getting a recommendation based on real usage, not guesswork. A family-owned company like Mel's Heat & Air Inc. understands that most homeowners are not looking for the most expensive option. They are looking for the right one - something dependable, fairly priced, and built to last.
If you are weighing your next replacement, start with how your home actually uses hot water every day. That answer will tell you more than any sales pitch ever will.
When a rooftop unit quits in the middle of a hot Central California afternoon, nobody cares how good it looked on paper. They care about the tenants, customers, staff, and inventory that now have to deal with rising temperatures and lost time. A solid commercial hvac maintenance checklist helps prevent that kind of disruption by turning maintenance from a last-minute scramble into a routine part of running the building.
For most small and midsize businesses, the goal is not perfection. It is fewer breakdowns, better comfort, lower energy waste, and fewer surprise repair bills. That sounds simple, but commercial systems are not all built the same. A small office with one split system needs a different approach than a restaurant with refrigeration loads, ventilation demands, and longer operating hours.
What a commercial HVAC maintenance checklist should actually do
A good checklist is not just a sheet technicians initial and file away. It should help you spot wear before it becomes failure, track how the system is performing over time, and make sure critical components are not being ignored between seasons.
That means the checklist should cover airflow, electrical parts, controls, drainage, cleanliness, refrigerant performance, and safety. It should also reflect how the building is used. A retail store with doors opening all day takes on more dust and heat than a quieter professional office. A building with extended summer hours may need more frequent inspections than one that closes on weekends.
The biggest mistake property owners make is using the same schedule for every site. Some equipment can be checked quarterly and stay in good shape. Other systems need monthly attention, especially if filters load quickly, occupancy changes often, or indoor air quality matters to the business.
The core commercial HVAC maintenance checklist
Every commercial hvac maintenance checklist should start with the basics that affect system reliability the most. Air filters need to be inspected and replaced on schedule, not just when someone remembers. Dirty filters restrict airflow, raise energy use, and put unnecessary strain on motors and compressors.
Coils should be checked for dirt buildup and cleaned as needed. Evaporator and condenser coils lose efficiency when dust, grease, and debris collect on the surface. In commercial settings, this happens faster than many owners expect, especially near parking lots, kitchens, loading areas, or agricultural activity.
Belts, bearings, and moving parts need attention too. Worn belts can slip, crack, or break, while neglected bearings can overheat and damage motors. Lubrication matters, but only where the equipment design calls for it. Over-lubricating can cause its own problems.
Drain pans and condensate lines should be inspected for blockage, algae, and standing water. A clogged drain may look minor until it causes water damage, ceiling stains, or a shutdown triggered by a safety switch. In cooling season, this is one of the easiest issues to prevent.
Electrical connections need to be tightened and inspected for signs of heat damage, corrosion, or wear. Contactors, capacitors, relays, and wiring can all degrade over time. Catching a weak capacitor during maintenance is a lot better than finding out about it when the system fails during business hours.
Thermostats and control systems should be tested to confirm they are reading correctly and staging equipment properly. In some buildings, comfort complaints are caused less by mechanical failure and more by bad calibration, scheduling errors, or controls that no longer match how the space is being used.
Refrigerant levels and operating pressures should be checked when performance suggests a problem. Not every visit requires adding refrigerant, and topping off a leaking system without finding the cause is not real maintenance. If refrigerant is low, the leak needs to be identified and addressed.
Technicians should also inspect blower assemblies, fan motors, heat exchangers when applicable, economizers, dampers, and safety controls. On packaged rooftop units, that includes checking weather exposure issues such as damaged panels, insulation breakdown, and debris around the equipment.
Seasonal timing matters more than most people think
Commercial maintenance works best when it is planned around heavy-use periods. Cooling inspections should happen before summer heat arrives, and heating inspections should happen before colder weather sets in. Waiting until the first heat wave or first cold snap usually means you are competing with emergency calls.
Spring service is the right time to inspect condenser coils, test cooling performance, verify refrigerant operation, clear drains, and check fan motors under load. Fall service should focus more on heating components, ignition systems, burners where applicable, heat exchangers, and control sequences.
That said, twice-a-year maintenance is not always enough. Buildings with long run times, high occupancy, dusty surroundings, or sensitive comfort requirements may need quarterly service. In some cases, monthly filter checks alone can make a noticeable difference in operating cost and equipment life.
What building owners and managers can watch between service visits
Not every maintenance task should be handled in-house, but there are practical things owners and managers can keep an eye on. If utility bills rise without an obvious reason, that deserves attention. If some rooms stay warm while others are too cold, airflow or control issues may be developing.
Unusual noise is another early warning sign. Squealing, grinding, rattling, or short cycling should not be ignored just because the system is still running. Water around indoor units, musty odors, and visible dirt buildup near vents can all point to a maintenance issue that is getting worse.
Outdoor equipment areas should stay clear. Trash, weeds, stored materials, and other obstructions reduce airflow and make service harder. Even a well-maintained unit can struggle when the space around it is neglected.
For businesses that rely on comfort to serve customers, it also helps to track complaints. If staff at the front of the building keep reporting uneven temperatures every afternoon, there is probably a pattern worth investigating instead of treating it as a one-time issue.
Why checklists fail in the real world
A checklist is only useful if the inspection is thorough and the findings lead to action. One common problem is pencil-whipping, where boxes get checked but nothing meaningful is evaluated. Another is treating every issue as either an emergency or nothing at all, with no middle ground for planning repairs.
Good maintenance includes notes on condition, not just completion. A belt may still be operating, but if it is cracking, that should be documented. A capacitor may still test within range, but if it is weakening, the owner should know. Honest communication matters because not every recommendation needs same-day approval, but the customer deserves a clear picture.
This is where experience counts. A technician who works on commercial equipment regularly can tell the difference between normal wear and the kind of wear that usually leads to downtime. That judgment is hard to capture in a generic online checklist.
Customizing the checklist for your building
The best commercial HVAC maintenance checklist is the one that matches the equipment and the business using it. Office buildings often need stronger focus on comfort zoning, thermostat scheduling, and indoor air quality. Retail spaces may need more attention to entryway pressure balance, rooftop package units, and customer comfort during peak traffic.
Restaurants, light industrial spaces, and mixed-use buildings usually call for a more detailed maintenance strategy. Grease, heat, dust, process loads, and longer hours all put extra stress on HVAC systems. In those environments, skipping maintenance for even one season can turn into a bigger repair bill fast.
Age matters too. Older equipment may need more frequent inspection, even if replacement is not immediately necessary. That does not mean it should automatically be condemned. A lot depends on condition, repair history, part availability, and how critical that unit is to daily operations.
A family-owned company like Mel's Heat & Air Inc. sees this firsthand with local businesses - some systems need a straightforward seasonal tune-up, while others benefit from a maintenance plan built around heavier use and tighter uptime demands. The right recommendation is the one that fits the building, not the one that sells the most work.
A practical standard for staying ahead of breakdowns
If you manage a commercial property, think of maintenance as protection for your schedule as much as your equipment. The system does not need attention only when it stops working. It needs regular checkups that catch the quiet problems first, before they become tenant complaints, uncomfortable staff, or a closed storefront.
The best time to tighten a connection, replace a worn belt, clear a drain, or swap a dirty filter is before the weather gets extreme and before the unit is under its heaviest load. That is what a checklist is for. Not paperwork, not busywork - just a steady, honest way to keep the building running the way it should.
If your current process is inconsistent, start by getting the basics done on time and building from there. A clean filter, a tested control, and a trained eye on the equipment can prevent a lot of trouble later.
When the first real heat wave hits Turlock, a lot of AC systems show their age all at once. That is why an ac tune up checklist matters before summer settles in for good. A good tune-up is not about selling parts you do not need. It is about catching wear early, keeping airflow strong, and helping your system hold up through long Central Valley afternoons.
If you are a homeowner or small business owner, the smartest way to look at maintenance is simple: a tune-up should improve performance, reduce the chance of a breakdown, and give you a clear picture of your system’s condition. If it does not do those three things, it is not much of a tune-up.
What an AC tune-up should actually include
A real maintenance visit should cover more than a quick filter glance and a bill. The technician should inspect, test, clean, and verify the parts that affect cooling, efficiency, and safe operation. Some systems need more attention than others, especially older units, heat pumps, or equipment that runs hard for long stretches.
The goal is not perfection on paper. The goal is dependable cooling when temperatures climb into the triple digits.
Thermostat check and control test
Every ac tune up checklist should start at the thermostat. If the controls are off, the rest of the system never gets a fair chance to perform. A technician should confirm the thermostat is reading accurately, responding correctly, and signaling the system to turn on and off as it should.
This is also where programming issues show up. Sometimes the problem is not the AC unit at all. It is a bad schedule, weak batteries, poor sensor placement, or a smart thermostat setup that is fighting the way the building is actually used.
Air filter inspection
A dirty air filter is one of the most common causes of weak airflow and unnecessary strain. Checking it sounds basic because it is basic, but basic does not mean minor. A clogged filter can make the system work harder, cool less effectively, and shorten equipment life over time.
Not every home needs the same replacement schedule. A house with pets, dust, allergy concerns, or high summer runtime may need more frequent changes than the standard rule of thumb.
Indoor coil and blower inspection
Your indoor components do a lot of the heavy lifting, but they are easy to ignore because they are out of sight. During a tune-up, the evaporator coil should be inspected for dirt buildup, and the blower assembly should be checked for cleanliness and proper operation.
If these parts are dirty, airflow drops and cooling performance suffers. In some cases, homeowners think they need a repair or even replacement when the real issue is restricted airflow inside the system.
Condenser coil cleaning
Outside units in the Central Valley collect dust, cottonwood, dry grass, and yard debris fast. That is why condenser cleaning belongs on every ac tune up checklist. When the outdoor coil is coated in dirt, the system cannot reject heat efficiently. The result is longer run times and higher energy use.
This is one of those areas where light maintenance makes a real difference. A clean condenser helps the whole system breathe easier.
Refrigerant level and pressure check
Refrigerant is not something that should just "run low" under normal conditions. If levels are off, that usually points to a leak, improper charge, or a previous service issue. A technician should check pressures and system performance to see whether refrigerant levels are where they should be.
This part matters because an undercharged or overcharged system can cool poorly and put stress on the compressor. It also helps separate a true refrigerant problem from other issues that can look similar, like airflow restrictions or dirty coils.
Electrical inspection and tightening connections
Loose or worn electrical components are a common source of summer breakdowns. Capacitors, contactors, relays, wiring connections, and voltage readings should all be checked during maintenance.
This is not glamorous work, but it is valuable work. Many no-cool calls start with an electrical part that gave warning signs before it failed. A tune-up gives you a chance to catch that before you are sitting in a hot house waiting for emergency service.
Drain line and condensate check
Your AC removes humidity as it cools, and that moisture has to go somewhere. If the condensate drain line is clogged, water can back up and trigger shutoffs or cause damage around the air handler.
A proper tune-up should include checking and clearing the drain system as needed. In hotter months, especially when systems are running hard, this small step can prevent a frustrating service call.
Fan motor and moving parts inspection
The blower motor indoors and the fan motor outdoors both need to operate within proper range. A technician should inspect motor condition, listen for unusual noise, and check for signs of overheating or wear.
Some older systems may also have components that need lubrication, though many modern units use sealed bearings. This is a good example of where maintenance is not one-size-fits-all. The right checklist depends partly on the age and design of the equipment.
The ductwork and airflow side of the checklist
A system can have good parts and still cool poorly if airflow is wrong. That is why an AC tune-up should not stop at the equipment cabinet.
Supply and return airflow review
If certain rooms stay warm, airflow balance may be part of the problem. A technician should look for obvious restrictions, disconnected ducts, crushed flex duct, blocked returns, or closed registers that are affecting performance.
This is especially important in homes that have had remodeling work, added insulation, or changes to room usage. Airflow problems often build slowly, so people get used to them until the hottest month of the year exposes them.
Visible duct condition
Leaky or damaged ducts can waste conditioned air before it ever reaches the rooms you are trying to cool. During a tune-up, visible duct sections should be inspected where accessible, especially in attics, crawl spaces, or mechanical rooms.
Not every duct issue can be diagnosed in a quick visit, but obvious tears, loose connections, and insulation damage should not be overlooked.
What homeowners can do before the appointment
You do not need to be an HVAC technician to help your system. Change or clean the filter if needed, clear leaves and debris from around the outdoor unit, and make sure vents inside the home are open and unobstructed. If you have noticed weak airflow, odd noises, short cycling, or rooms that never cool evenly, mention that during the visit.
That last part helps more than people realize. A checklist is useful, but your day-to-day experience with the system often points to the real issue faster than a generic inspection alone.
What a tune-up will not fix
Maintenance is worthwhile, but it is not magic. A tune-up will not reverse major compressor damage, solve a badly undersized system, or make a 20-year-old unit perform like new. It can improve operation, reduce strain, and catch problems early, but sometimes the honest answer is that a repair or replacement discussion is needed.
That is where trust matters. The right technician should explain what is routine, what is worn, what can wait, and what should be handled soon. No scare tactics. No pressure. Just clear information you can use.
How often to use an ac tune up checklist
For most homes and small businesses, once a year before cooling season is the right baseline. If the system runs almost year-round, serves a commercial space, or has a history of repairs, more frequent maintenance may make sense.
Older systems usually benefit the most from regular tune-ups because small issues become expensive issues faster. Newer systems still need maintenance too, especially if you want them to stay efficient and avoid preventable wear.
Why local climate changes the checklist
Central California is hard on air conditioning equipment. Long cooling seasons, dust, dry conditions, and peak summer demand all add up. That means a generic national checklist may miss what matters most here, especially outdoor coil condition, airflow, drain performance, and signs of heat-related electrical wear.
For local property owners, practical maintenance beats fancy language every time. A good tune-up should leave you knowing whether your system is ready for summer, where it stands today, and what to watch over the next few months.
At Mel's Heat & Air Inc., that is the standard people should expect from any service company worth inviting into their home or business. Honest recommendations, careful work, and no push to replace equipment that still has life left in it.
If you are planning ahead before the next stretch of 100-degree days, treat maintenance as a way to stay ahead of trouble, not react to it. A solid checklist today can mean fewer surprises when you need your AC the most.
That back bedroom that never cools down, the garage office that turns into an oven by noon, the older home with no existing ductwork - those are the situations where ductless HVAC installation starts making a lot of sense. For many homeowners and small business owners in Central California, a ductless system is not about bells and whistles. It is about getting reliable comfort where a traditional system falls short.
When ductless HVAC installation makes sense
A ductless system, often called a mini-split, gives you heating and cooling without requiring a full network of ducts. It uses an outdoor unit connected to one or more indoor air handlers. That setup can be a smart fit for room additions, converted garages, older homes, small offices, server rooms, workshops, and spaces that stay uncomfortable no matter how much you adjust the thermostat.
In this area, that flexibility matters. Not every property was built with modern duct design in mind, and not every owner wants to open walls and ceilings just to extend central air. Ductless equipment offers a practical middle ground. You can target the rooms that need help most instead of replacing an entire system before it is truly necessary.
That said, ductless is not automatically the right answer for every building. If your home already has good ductwork and a properly sized central system, adding another full solution may not be the best use of your money. Sometimes the real issue is airflow, insulation, attic heat, or duct leakage. A trustworthy contractor should say that plainly.
What happens during ductless HVAC installation
A good installation starts long before the equipment goes on the wall. The first step is figuring out the size of the space, how much sun it takes on, how well it is insulated, and how the room is actually used. A bedroom, a retail space with constant foot traffic, and a garage gym all have different heating and cooling demands.
From there, the installer determines the right system capacity and whether you need a single-zone or multi-zone setup. Single-zone systems are common for one problem area, like an addition or detached workspace. Multi-zone systems work better when several rooms need independent temperature control.
Placement is a big part of performance. Indoor units need to be located where air can circulate well and where they will not constantly blow directly on occupants. The outdoor unit needs room to breathe, proper clearance, and a location that supports service access later. Good placement helps the system run efficiently and keeps noise down.
The actual install usually includes mounting the indoor unit, setting the outdoor unit, running refrigerant lines and electrical connections, creating a clean wall penetration, and testing the system thoroughly. The final step should never be rushed. Refrigerant charge, drainage, controls, and overall operation all need to be checked before the job is done.
Why sizing matters more than most people think
One of the most common mistakes in HVAC is assuming bigger is better. It is not. An oversized ductless system can cool a room too quickly without removing enough humidity, which can leave the space feeling clammy. It can also short cycle, putting extra wear on components. An undersized system will run too long and still struggle on the hottest afternoons.
That is why proper load calculation matters. In Central California, summer heat is no joke, but square footage alone is still not enough to size a system. Ceiling height, window exposure, insulation, occupancy, and heat-producing equipment all affect the answer.
For business owners, this matters even more. A small office with west-facing glass has different needs than a storage room. A salon, restaurant prep area, or technology room may create internal heat that changes the load completely. Shortcuts during the estimate stage often show up later as comfort problems and higher utility bills.
The biggest benefits of going ductless
The biggest advantage is zone control. You can condition the spaces you use most without forcing the whole property to run the same way. That can be especially helpful for families with different comfort preferences or property owners trying to keep energy costs under control.
Efficiency is another major reason people choose ductless. Because there are no ducts involved, you avoid the energy losses that can come from leaky or poorly insulated ductwork. Many modern ductless systems also use inverter-driven technology, which allows them to adjust output rather than constantly cycling on and off.
Installation is usually less invasive than adding or replacing full duct systems. That can save time, reduce disruption, and make ductless a strong option for older homes or finished spaces where major construction is not practical.
There is also the comfort factor. A properly installed mini-split can solve hot spots and cold spots that have frustrated property owners for years. That kind of targeted comfort tends to be what people notice first.
The trade-offs to understand before you install
Ductless systems have clear benefits, but they are not perfect. Indoor units are visible, and some homeowners simply do not like the look. There are mounting options that help, but aesthetics are still part of the decision.
Upfront cost can also be a sticking point. While ductless may save money compared to adding new ductwork throughout a property, the price can climb when multiple indoor zones are involved. What looks affordable as a one-room solution may become a bigger investment if you want full-building coverage.
Maintenance is different too. Filters need regular attention, and every indoor head needs to stay clean. If maintenance is ignored, performance drops. The good news is that routine care is straightforward when handled consistently.
Heating performance depends on the model and the application. Many ductless heat pump systems perform very well, but the right equipment choice still matters. If a contractor treats every building the same, that is a red flag.
Cost factors in ductless HVAC installation
Most people want a simple number, but honest pricing depends on the job. System size, number of zones, electrical requirements, line set length, wall or ceiling construction, and placement challenges all affect cost. A straightforward single-zone install is very different from a multi-zone setup across several rooms.
Brand and efficiency rating matter too, but installation quality matters just as much. A lower-priced system installed poorly can cost more over time through repairs, inefficiency, and early replacement. On the other hand, the most expensive equipment on the market is not always necessary for the space.
That is why a clear estimate should explain what you are paying for, not just hand you a big number. If someone is pushing equipment without discussing your layout, usage, and long-term goals, you are probably hearing a sales pitch instead of a recommendation.
Choosing the right contractor for the job
Ductless HVAC installation is only as good as the planning behind it. A contractor should inspect the property, ask how the space is used, and explain the trade-offs in plain language. You should not feel rushed into a larger system or extra zones you do not need.
Look for a company with real local experience, especially with homes and businesses common to this part of California. Climate, building style, insulation levels, and electrical setups can all affect the outcome. Experience helps avoid surprises.
It also helps to work with a team that can support the system after the install. Maintenance, service, and troubleshooting matter just as much as the first day the system turns on. Mel's Heat & Air Inc. has built its reputation around that kind of long-term service approach, which is what many property owners are looking for when they invest in new equipment.
Is ductless right for your home or business?
If you have one stubborn area that never stays comfortable, ductless may be the cleanest fix. If you are remodeling, adding square footage, or trying to heat and cool a space without existing ducts, it is often one of the most practical options available.
If your whole-home system is failing, the answer may be less obvious. Sometimes a ductless solution is the right replacement strategy. Other times, a central system, duct repair, insulation improvements, or a combination approach will serve you better. The right call depends on the building, your budget, and how you actually use the space.
The best installations start with honest answers, not pressure. If a room has been uncomfortable for years, or your current setup is costing too much to run, asking the right questions now can save you from buying the wrong system later.
If your air conditioner is struggling through another Central California summer, replacement usually stops being a someday project and becomes a this-week decision. Knowing how to prepare for AC replacement can save you time, prevent installation-day surprises, and help you make a solid choice for your home instead of a rushed one.
A new AC system is a major investment, but most problems people run into are not caused by the equipment itself. They come from poor planning, unclear expectations, or replacing one problem unit without looking at the rest of the system. A little preparation goes a long way if you want better comfort, lower stress, and a system that lasts.
How to Prepare for AC Replacement Before You Get Quotes
The first step is getting clear on why you are replacing the system. Sometimes the answer is obvious. Your unit is old, repairs are stacking up, and it still cannot keep up when the temperature spikes. Other times the issue is less straightforward. You may have uneven cooling, high utility bills, weak airflow, or rooms that never feel comfortable.
That matters because replacing the outdoor condenser alone does not always fix the real problem. Duct leaks, poor insulation, an oversized unit, a bad thermostat location, or an aging furnace or air handler can all affect performance. Before you compare equipment, take stock of what has actually been happening in the house. Write down how old the system is, what repairs have been done recently, and what comfort issues you want solved.
It also helps to think about timing. If your AC is still running, you may have the advantage of planning ahead instead of replacing it during an emergency. That gives you more time to compare options and ask better questions. If the unit has already failed, preparation still matters because it can keep the process moving without added delays.
Take a Look at the Whole System
An AC replacement is not always just an AC replacement. In many homes, the cooling system works together with the furnace, air handler, ductwork, thermostat, and insulation. If one part is upgraded while the others are in rough shape, you may not get the performance you expect.
This is where honesty from your contractor matters. A trustworthy company should explain what truly needs to be replaced, what can stay, and what issues may still limit comfort after the job is done. Sometimes a full system replacement makes the most sense. Other times you can keep part of the existing setup if it is in good condition and compatible with the new equipment.
There is a trade-off here. Replacing more components costs more up front, but keeping worn or mismatched parts can lead to efficiency problems or future repair bills. The right answer depends on the age and condition of the entire system, not just the outside unit.
Pay Attention to Ductwork and Airflow
Homeowners often focus on the equipment brand or efficiency rating, but airflow is just as important. If your ductwork leaks, is undersized, or has been patched too many times, your new system may struggle from day one.
If you have hot and cold spots now, mention that early. That is not a minor complaint. It is useful information that can affect system design. A good replacement plan should account for how air moves through the house, not just how cold the new unit can get.
Set Your Budget With Real Priorities
Before installation day arrives, decide what matters most to you. For some homeowners, the priority is the lowest upfront cost. For others, it is lower monthly energy bills, quieter operation, or longer equipment life. Most people want a balance of all three, but it helps to know where you are willing to spend and where you are not.
Higher-efficiency systems can reduce operating costs, especially during long hot seasons, but they are not always the best fit for every home. If you plan to stay in the house for years, investing in efficiency and durability may make sense. If you are replacing a failing system quickly and need to stay within a tighter budget, a dependable standard-efficiency option may be the smarter move.
This is also the time to ask about labor, warranty coverage, permits, and any electrical or duct modifications that could affect the total cost. A low quote is not always a better quote if important work is missing from it.
Prepare Your Home for Installation Day
Once you schedule the replacement, there are a few practical steps that make the day easier for everyone.
Start by clearing access to the indoor and outdoor equipment. Move storage boxes, tools, patio furniture, or anything else blocking the work area. If the indoor unit is in a garage, attic, or closet, make sure technicians can reach it safely and without delay. If the outdoor condenser sits near overgrown shrubs or fencing, trim back the area ahead of time.
If you have pets, make a plan to keep them secure and away from open doors or active work zones. Installation crews may be moving equipment in and out for several hours, and a stressed pet can easily slip outside.
It is also smart to protect nearby furniture or valuables if the work area is inside the home. A professional crew should work cleanly and carefully, but AC replacement is still a mechanical job. Giving technicians room to work helps the job go faster and reduces the chance of accidental damage.
Expect Some Downtime
Most replacements can be completed in a day, but that depends on the scope of work. If duct modifications, electrical updates, or thermostat upgrades are part of the project, it may take longer. Ask in advance how long your cooling will be off and whether there is anything you should do to prepare.
In hot weather, plan around that downtime. Close blinds early, avoid using heat-producing appliances, and make arrangements for children, older adults, or anyone sensitive to heat if the house is expected to warm up during the installation.
Know What Questions to Ask
Preparation is not just about moving boxes and signing paperwork. It is also about making sure you understand what you are buying.
Ask how the system size was determined. Bigger is not always better with air conditioning. An oversized unit can short cycle, waste energy, and leave the home feeling clammy. A properly sized system should be based on the house itself, not just the size of the old unit.
Ask whether your thermostat will work with the new equipment. Ask if existing ductwork is adequate. Ask what warranties apply to parts and labor. Ask what maintenance the new system will need and how often filters should be changed. If the answer to any of those questions feels vague, keep asking until it is clear.
This is where experience matters. A contractor who has served local homes for decades usually knows the common issues that show up in this area, from extreme summer heat to aging duct systems and insulation problems.
Plan for the First Week After Installation
Part of learning how to prepare for AC replacement is knowing that the job is not finished the second the new system turns on. Give yourself a little time to pay attention during the first week.
Notice how the system sounds, how evenly it cools, and how the thermostat responds. The house may not feel identical to the old setup, especially if the new unit is more efficient or operates differently. That said, obvious problems like weak airflow, unusual noises, or inconsistent temperatures should be reported right away.
You should also ask for a walkthrough before the crew leaves. Make sure you know how to operate the thermostat, where the filter is located, and what kind of maintenance will help protect your investment. If any permits or inspection steps are involved, confirm what happens next.
A Good Replacement Starts Before the Equipment Arrives
The best AC replacements are rarely the ones made in a panic with the cheapest number on the page. They are the ones where the homeowner took time to understand the system, asked direct questions, and worked with a contractor who values long-term performance over quick sales.
If you are preparing for a replacement in Turlock, Ceres, Denair, or nearby communities, keep your focus on comfort, fit, and quality of work. A good system should do more than cool the house today. It should give you dependable relief when the next stretch of triple-digit heat rolls in.
The first time you switch on the heat and catch a burning smell, it gets your attention fast. If you're asking why does furnace smell burning, the answer can be anything from harmless dust burning off to a problem that needs service right away. The key is knowing what kind of smell you're dealing with, how long it lasts, and whether it comes with other warning signs.
In many homes around Turlock, Ceres, and Denair, a furnace can sit unused for months during warmer weather. When cold weather finally rolls in and the system fires up, dust that settled on the heat exchanger, burners, or other internal parts can burn away. That light burning smell is common at the start of the heating season and usually fades within a few hours.
Still, not every burning odor is normal. A furnace works with heat, airflow, electrical components, and in many systems, gas combustion. When one of those parts is stressed, dirty, or failing, the smell can point to something more serious than seasonal dust.
Why does furnace smell burning when heat first turns on?
The most common cause is simple dust buildup. Over time, a thin layer of dust collects inside the system and on nearby duct surfaces. When the furnace starts heating again, that dust burns off and creates a dry, dusty burning smell.
This type of odor is usually mild. It should not smell like melting plastic, hot metal, or smoke from an electrical fire. It also should not keep getting stronger. If the smell starts when the system first comes on and fades after a short period, that's usually a normal start-of-season issue.
Homes with pets, recent remodeling, attic dust, or dirty return air paths may notice the smell more. The same goes for systems that have not had regular maintenance. A clean, tuned furnace generally has fewer startup odors and better airflow.
When a burning furnace smell is not normal
A stronger or sharper odor deserves more attention. If the smell does not go away, changes in character, or happens every time the furnace runs, something inside the system may be overheating or contaminated.
One possible issue is a clogged air filter. When airflow is restricted, the furnace can run hotter than it should. That extra heat can create a hot, dusty smell and put stress on components. In some cases, reduced airflow can also affect comfort throughout the house, making rooms heat unevenly.
Blower problems can create similar symptoms. If the blower motor is struggling, overheating, or failing, you may notice a hot electrical smell. This is different from normal dust burnoff. It often smells sharper and more mechanical, and it may be paired with weak airflow, strange noises, or the system shutting off too soon.
Wiring issues are another concern. Loose electrical connections, damaged insulation, or failing control boards can produce a burning plastic or fishy electrical smell. If you notice that kind of odor, turn the system off and have it checked. Electrical problems do not usually fix themselves, and they can get worse quickly.
What different burning smells can mean
Not all burning odors point to the same problem. Paying attention to the type of smell can help narrow down what is happening.
A dusty or dry smell usually means seasonal dust burnoff. That is the most common and least serious cause.
A smell like hot plastic may point to wiring, insulation, or another man-made material overheating. That is more urgent and should be inspected soon.
A metallic burning smell may come from overheated mechanical parts or debris near the burners or heat exchanger. It is not always an emergency, but it should not be ignored.
An oily or smoky odor can sometimes mean dirt buildup on burners or combustion-related issues. If you have a gas furnace and notice any unusual smell along with poor heating performance, soot, or repeated cycling, it is best to stop running the system until it is checked.
There is also a difference between a burning smell and a gas smell. Natural gas is often described as smelling like rotten eggs. If that is what you notice, leave the area and follow gas safety procedures right away. That is a different issue from normal startup odor.
Why does furnace smell burning after changing the filter?
If you're still wondering why does furnace smell burning even after replacing the air filter, the problem may be deeper inside the system. A new filter helps airflow, but it does not remove dust already inside the blower compartment, burners, evaporator area, or ductwork.
It is also possible the wrong filter was installed. A filter that is too restrictive for the system can choke airflow instead of helping it. Homeowners sometimes buy the highest-rated filter thinking it will improve air quality, but some furnaces are not designed for heavy filtration without adjustments. Better filtration can be a good thing, but only if the system can handle it.
If the smell continues after a filter change, especially with reduced airflow or odd noises, it makes sense to have the furnace inspected rather than guessing.
Signs you should turn the furnace off
A short-lived dusty smell at the first startup is one thing. There are other times when it is safer to shut the system down and call for service.
Turn the furnace off if the smell is strong or getting worse, if you see smoke, if the odor smells electrical or like melting plastic, or if the furnace is making banging, screeching, or buzzing noises. The same goes for a unit that keeps tripping the breaker or cycles on and off unusually fast.
If anyone in the building feels lightheaded, develops a headache, or notices poor air quality along with furnace operation, stop using the system until it can be checked. Those symptoms do not automatically mean a furnace issue, but they are not something to brush off.
For businesses, the stakes can be higher because comfort complaints, downtime, and safety concerns affect employees and customers. A small issue in a rooftop or packaged system can become a bigger disruption if it is left alone.
How a professional finds the cause
A proper diagnosis is more than just smelling the air and replacing a part. A technician will usually check the filter, blower assembly, wiring, burners, motor condition, safety controls, and overall airflow. If needed, they may inspect the duct system, venting, and heat exchanger area to see whether debris, overheating, or component wear is causing the odor.
This matters because furnace smells can overlap. A dirty system with poor airflow may smell like dust at first, but the real problem could be a stressed motor. A homeowner may think the issue is minor when the furnace is actually running hotter than it should. On the other hand, not every odd smell means a major repair. Sometimes the fix is straightforward once the root cause is found.
That honest middle ground matters. You want a technician who will tell you when a smell is normal, when a cleaning or tune-up will solve it, and when repair is the safer call.
How to reduce burning smells in the future
Regular maintenance does most of the heavy lifting here. A furnace that is cleaned, inspected, and adjusted before winter is less likely to surprise you with strong odors when the temperature drops.
It also helps to change filters on schedule, keep supply and return vents open, and avoid storing boxes, paint, or household chemicals too close to the furnace area. Dust, clutter, and restricted airflow all raise the odds of odor issues.
If your home has had recent construction, drywall dust, attic work, or heavy indoor dust, mention that during service. Fine debris moves through the system more than many homeowners realize.
For older furnaces, there is a trade-off. Maintenance can keep many systems running safely and efficiently for years, but age does increase the chances of recurring odor complaints, blower wear, and electrical issues. If a unit is repeatedly having problems, repair may not always be the most cost-effective path.
A burning smell from a furnace is not something to panic over, but it is something to respect. If it fades quickly, it may be nothing more than dust. If it lingers, smells sharp or electrical, or comes with other symptoms, it is worth getting a clear answer from a trusted HVAC professional. At Mel's Heat & Air Inc., we believe homeowners and business owners deserve straight answers, fair recommendations, and service that protects comfort as well as safety. When heat should make your space feel better, not leave you guessing, a careful inspection is the smart next step.
That old system usually gives you a warning before it quits - higher bills, uneven rooms, longer run times, and more repair calls than you want to pay for. A good heat pump installation guide should help you make a smart decision before you are stuck without heating or cooling on a 100-degree Central California afternoon.
For many homeowners, a heat pump is a practical upgrade because it handles both heating and cooling in one system. But the equipment itself is only part of the equation. Sizing, ductwork, airflow, insulation, electrical capacity, and installation quality all affect how well that new system performs. If any one of those pieces is off, even a good unit can end up costing more to run and doing a worse job keeping your home comfortable.
What a heat pump installation guide should actually tell you
A lot of articles make heat pump replacement sound simple. Pick a brand, choose a tonnage, set an install date, and you are done. Real life is not that tidy.
A useful heat pump installation guide starts with the home, not the brochure. Square footage matters, but so do ceiling height, window exposure, insulation levels, duct condition, shade, layout, and how your family actually uses the space. Two homes that look similar from the street can need very different system designs.
That is why a proper estimate should include more than a quick glance at the old unit. A contractor should look at your existing equipment, inspect the indoor and outdoor components, review ductwork, and ask about comfort issues you have already noticed. If one back bedroom is always too warm in summer or your upstairs never seems to heat evenly, the new installation should address that instead of repeating the same problem with newer equipment.
Is a heat pump the right fit for your home?
In much of Central California, the answer is often yes. Heat pumps are well suited for areas where winters are mild to moderate and summers are hot. They can deliver efficient cooling in summer and dependable heating during colder months without relying on a separate traditional furnace in many applications.
That said, the right answer still depends on your home and goals. If your current duct system is in poor shape, that may need attention before a new heat pump can perform the way it should. If you have an older home with weak insulation or major air leaks, you may get better long-term value by addressing those issues along with the equipment replacement.
There is also the question of equipment type. A central ducted heat pump makes sense for many whole-home applications, while a ductless system may be a better fit for additions, converted garages, problem rooms, or homes without existing ducts. The best choice is not always the most expensive one. It is the one that fits the property and solves the comfort problem without creating new ones.
Choosing the right size matters more than most people think
One of the biggest mistakes in HVAC installation is oversizing. Homeowners often assume bigger means stronger and better. In reality, an oversized heat pump can short cycle, wear out faster, and leave humidity control and room balance worse than expected.
Undersizing has its own problems, of course. A system that is too small may run constantly during peak weather and still struggle to keep up. The goal is not the largest system your budget can buy. The goal is the properly sized system for your house.
A contractor should use load calculations, not guesswork, to determine capacity. That process takes into account insulation, windows, orientation, square footage, and other factors that affect heating and cooling demand. It may not be the most exciting part of the job, but it is one of the most important.
Efficiency ratings are important, but not the whole story
Higher efficiency equipment can reduce operating costs, but ratings on paper do not guarantee savings by themselves. A high-efficiency heat pump installed on leaky ducts or paired with poor airflow may never deliver the return you expect.
This is where honest advice matters. Sometimes stepping up to a better efficiency level makes financial sense. Sometimes it is smarter to choose a solid mid-range system and invest part of the budget in duct sealing, attic insulation, or thermostat upgrades. It depends on the house, your energy use, and how long you plan to stay there.
The heat pump installation process, step by step
Most homeowners want to know what happens once they say yes to the job. While every property is different, the process usually follows a clear path.
First comes the evaluation and quote. This should cover system sizing, equipment options, any needed duct or electrical work, and what is included in the installation. If permits are required, that should be discussed up front. Clear communication here helps avoid surprises later.
Next comes preparation. On install day, the old equipment is removed, and the work area is protected as much as possible. If the project includes replacing both indoor and outdoor components, technicians will disconnect and remove the existing system safely.
Then the new equipment is set and connected. That includes refrigerant lines, drain lines, electrical connections, thermostat wiring, and any transitions needed to fit the air handler or indoor coil properly. If duct modifications are needed, this is when they are handled.
After that, the system is tested and adjusted. This part matters. Good installers do not just turn it on and leave. They check refrigerant charge, verify airflow, test heating and cooling operation, inspect controls, and make sure the thermostat is communicating properly with the system. Final performance checks help protect your comfort and your equipment.
What can affect installation time?
A straightforward replacement may move quickly, but not every job is straightforward. If the ductwork needs repairs, the electrical panel needs upgrades, or the equipment location is difficult to access, the timeline can change. Older homes sometimes come with hidden issues that only become obvious once the old system is removed.
That does not mean the project is going off track. It just means the crew is dealing with the real conditions of the home. A good contractor explains those issues clearly and gives you practical options instead of pushing unnecessary add-ons.
Common mistakes to avoid
The biggest mistake is choosing based on price alone. Everyone wants fair pricing, and that is reasonable. But the lowest bid is not always the best value if it leaves out needed duct repairs, proper startup testing, or permit requirements.
Another common issue is replacing equipment without addressing the home itself. If airflow has been poor for years, if certain rooms never stay comfortable, or if utility bills keep climbing, the problem may not be solved by a new outdoor unit alone.
It is also worth asking who will service the system after the installation. Heat pumps need regular maintenance just like any other HVAC equipment. Working with a company that installs and supports what it sells can make ownership a lot easier over time.
Questions worth asking before you approve the job
Homeowners do not need to know every technical detail, but they should feel comfortable asking direct questions. What size system are you recommending, and why? Will my ductwork need modifications? What efficiency options make sense for my home? Are permits included? What warranty coverage applies to the equipment and labor?
You should also ask how the system will be commissioned after installation. Proper setup is not a small detail. It is part of what determines whether the equipment runs efficiently and lasts.
A company with local experience should be able to explain these answers in plain language. That is one reason many homeowners in Turlock, Ceres, Denair, and nearby communities prefer working with an established local contractor like Mel's Heat & Air Inc. You want somebody who understands the climate, the housing stock, and the value of doing the job right the first time.
Planning for long-term performance
A heat pump is not just a purchase. It is a system you will live with for years. That is why the installation should be viewed as a long-term investment in comfort, efficiency, and reliability.
After the system is installed, regular maintenance helps protect that investment. Filters need to be changed on schedule, outdoor units need to stay clear of debris, and seasonal tune-ups help catch small issues before they become expensive ones. The better the installation and follow-up care, the better your chances of getting steady performance over the life of the system.
If you are comparing options now, take your time and pay attention to how the estimate is done. The right contractor will not rush you, talk over you, or push equipment that does not fit your needs. They will look at the whole home, explain the trade-offs, and recommend a solution built for comfort that lasts.
The best heat pump installation is not the one that sounds the fanciest on paper. It is the one that keeps your home comfortable when the weather turns, your bills reasonable, and your family from having to think about the HVAC system at all.
If your AC is limping through another Central Valley summer, replacement stops being a future project and starts feeling urgent. This central california hvac replacement guide is built for homeowners and small business owners who need straight answers - not a sales pitch - about when to replace, what to expect, and how to choose a system that will actually hold up in our heat.
Why HVAC replacement looks different in Central California
HVAC decisions in Turlock, Ceres, Denair, and nearby communities are not the same as they are in milder parts of the country. Long cooling seasons, triple-digit summer stretches, dust, and heavy system use put real strain on older equipment. A unit that might hang on for a few more years somewhere else can become expensive and unreliable much faster here.
That is why replacement should not be judged by age alone. A 12-year-old system that has been well maintained may still have life left. Another system of the same age may already be costing too much in repairs, running up utility bills, and struggling to keep rooms comfortable by mid-afternoon. Local climate, maintenance history, duct condition, and installation quality all matter.
When repair still makes sense
Not every aging system needs to be replaced right away. If a repair is minor, the equipment has been dependable, and the system is still sized correctly for the building, keeping it going can be the practical choice. That is especially true if the unit is not yet near the end of its expected service life and the repair cost is reasonable.
A good contractor should be able to tell you plainly whether the repair is worth it. If the problem is isolated - say a capacitor, contactor, thermostat, or minor electrical component - replacement may be unnecessary. Honest service means fixing what can be fixed and not pushing new equipment before the numbers support it.
Signs it is time to replace instead of repair
The clearest sign is not always a full breakdown. More often, replacement becomes the better move when problems start stacking up. Maybe the system runs constantly but never quite catches up. Maybe the back bedrooms stay warm while the front of the house gets cold. Maybe your energy bill keeps climbing even though your habits have not changed.
Frequent repairs are another warning sign. One expensive repair can happen on any system. Two or three in a short stretch usually point to a unit that is wearing out. If major components like the compressor or heat exchanger are failing, replacement often makes more financial sense than putting more money into old equipment.
Indoor comfort also matters. If your home or business feels humid, dusty, unevenly cooled, or noisy, the issue may not be the condenser alone. It could be tied to duct leaks, poor airflow, insulation issues, or a mismatched system. Replacing HVAC equipment without addressing those problems can leave you with a newer unit but the same comfort complaints.
A practical central california hvac replacement guide for budgeting
Most people want one simple number, but HVAC replacement does not work that way. Cost depends on equipment type, efficiency level, home or building size, duct condition, electrical needs, and whether the job is a straightforward swap or a more complete upgrade. A heat pump replacement will be priced differently from a traditional split system. A commercial rooftop unit is a different category altogether.
The lowest quote is not always the lowest long-term cost. A cheaper install can become expensive if the equipment is oversized, undersized, or installed without enough attention to airflow and duct performance. On the other hand, the highest-efficiency system is not automatically the best value either. In some cases, the payback from premium efficiency takes longer than most owners expect.
What matters is fit. You want a system that matches the property, the usage pattern, and the budget. That usually means looking at upfront cost, likely utility savings, expected repair frequency, warranty coverage, and how long you plan to stay in the property.
Choosing the right type of system
For many Central California homes, a traditional split system still makes sense. It is familiar, proven, and often cost-effective for whole-home heating and cooling. If the ductwork is in good shape and the current setup has worked well overall, a replacement in the same category may be the easiest path.
Heat pumps are also worth a serious look. They can deliver efficient heating and cooling in one system, and they continue to improve in performance. For homes looking to move away from older heating equipment, or for owners focused on efficiency, a heat pump may be a smart option. Whether it is the best fit depends on the building, the existing infrastructure, and your comfort preferences during colder months.
Ductless systems can be a strong solution when parts of a home or business never stay comfortable, or when adding ductwork would be expensive or impractical. They are especially useful for room additions, converted garages, smaller offices, and targeted problem areas. The trade-off is that whole-home ductless design needs to be planned carefully so it does not feel pieced together.
Efficiency matters, but so does sizing
Many buyers focus on efficiency ratings first, and that is understandable. Higher efficiency can lower operating costs, which matters when AC runs hard for months at a time. But a high-efficiency unit installed incorrectly will not perform the way it should.
Proper sizing is just as important. An oversized system can short cycle, wear out faster, and leave humidity control weaker than expected. An undersized system may run constantly and still struggle in peak heat. Good replacement work starts with load calculations and a real evaluation of how the building performs, not a guess based on square footage alone.
This is also where ductwork enters the conversation. Leaky, undersized, or poorly designed ducts can waste a large share of the conditioned air you are paying for. If your contractor never mentions airflow, return ducts, or insulation conditions, that is a red flag.
What homeowners and business owners should expect during replacement
A quality replacement should begin with questions. How has the current system been performing? Which rooms are uncomfortable? How high have utility bills been? Are there indoor air quality concerns, noise issues, or schedule demands for the business? These details help shape the right recommendation.
Once the scope is clear, the estimate should spell out what is being replaced, what stays, and what additional work may be needed. That could include thermostat upgrades, duct repair, pad replacement, drain improvements, electrical updates, or crane access for commercial equipment. Clear expectations matter because surprise costs usually come from skipped conversations at the start.
Installation day should not feel chaotic. A professional crew protects the property, removes old equipment safely, installs and tests the new system, and checks airflow and controls before calling the job done. For commercial spaces, minimizing downtime is part of the job too.
Timing your HVAC replacement
Emergency replacement in July is sometimes unavoidable, but it is rarely ideal. When a system is already showing signs of decline, planning ahead gives you more options. You have more time to compare equipment, review estimates, and make decisions without the pressure of a hot house or a business losing comfort during operating hours.
Spring and fall are often easier times to schedule planned replacements, but the right time is really when the old system starts costing more than it is worth. Waiting too long can mean more repair bills, higher utility costs, and a greater chance of failure on the hottest or coldest day of the year.
The value of a local contractor who does not oversell
Replacement is a major purchase, and trust matters. You want a contractor who knows Central California conditions, explains your options clearly, and treats repair versus replacement as a real decision, not a scripted sales process. That means being upfront about trade-offs, whether that is equipment price, efficiency gains, duct improvements, or expected lifespan.
For local families and businesses, that kind of honesty goes a long way. A company like Mel's Heat & Air Inc., serving the area since 1989, understands that long-term reputation is built by recommending what fits the property and budget - not by selling more system than the customer needs.
If you are facing repeated repairs, rising bills, or uneven comfort, the best next step is not guessing. It is getting a clear evaluation of the equipment, ductwork, and building so you can make a replacement decision with confidence and get back to a home or workplace that feels right when Central California weather is at its worst.